It has finally happened…
This post is all about photography software. If “Lightroom” doesn’t ring a bell with you then you might want to skip this. But if it does then read on, you might find some inspiration !
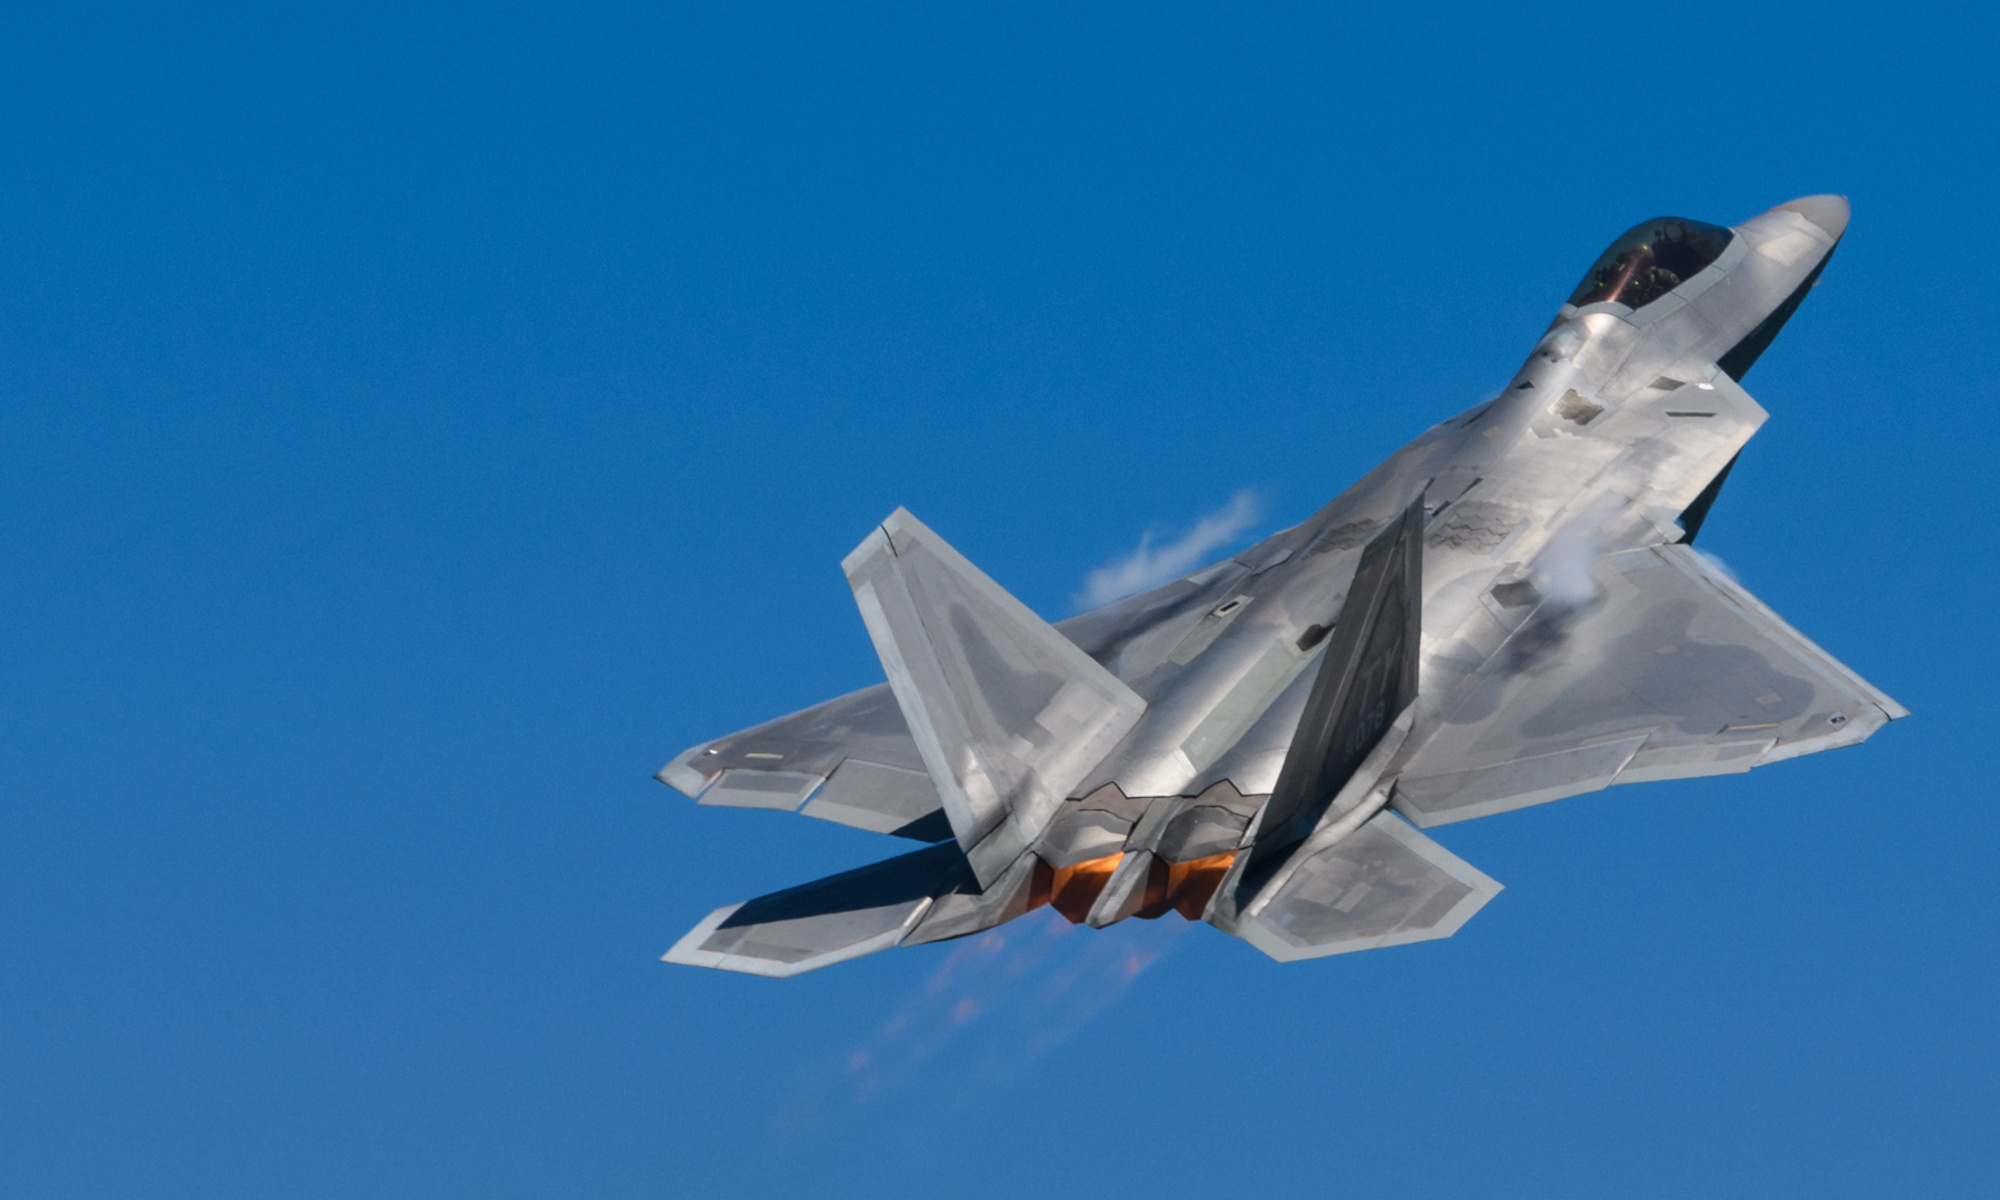
Last Sunday was a momentous moment. Not only for the first time ever was a skyscraper on fire successfully caught by a pair of giant chopsticks when it returned from the edge of space, but I also uninstalled a piece of software which has been at the core of my photography workflow for the last thirteen years…for good.
Adobe Lightroom has been my software of choice when it comes to organising and editing my photography images, and I can say with some bragging rights that I have gotten quite proficient with it over the years. The initial work of setting up a proper workflow for both importing new images, and editing these, have paid off immensely. Nevertheless, there was this nagging feeling, especially the last couple of years, that this was not the way to go.
So, what’s wrong with Lightroom? For me, a couple of things:
- It has become expensive. I don’t mind paying for a proper piece of software, but Adobe has gone ridiculous. Even the Lightroom Classic I was using is no longer offered as a one-time purchase or upgrade, but only as a subscription. I hate that. I want to buy something, not rent it. It forces long time users to either keep paying substantial fees forever, or loose your own, many years worth of work because it has been taken hostage by Adobe. There are more issues, like when you upload your own images Adobe believes it can claim ownership, stuff like that. Now…there are ways to keep using Lightroom Classic “on the cheap”, if you know what you are doing and, worst case, don’t mind messing your computer up massively, but I’m not going into that here.
- Over the years it has become a slow process to get a bunch of images into Lightroom. Granted, I choose to have all RAW images converted to DNG format which even more slows down the process. After that it is almost mandatory to create 1:1 previews (which also takes up a lot of time) if you don’t want to wait for what feels like ages whenever you zoom in on an image when viewing or editing.
- It does not work on Linux. And that is a problem for me. When I switched from Windows to Linux many years ago, it was still possible to run an old version of Lightroom on Linux (with Wine, should you want to know). But this was quickly no longer possible, and Adobe never had any intention whatsoever to port Lightroom over to Linux. For me the only workable option was to have a Windows virtual machine on my Linux laptop. Which works…but is not ideal. It is even slower, more resource hungry and lacking any GPU support.
There are two Lightroom‘s nowadays. There’s the “Lightroom Classic” desktop version I was using, and the cloud-based “Lightroom CC”. I have no experience whatsoever with the latter, but I am sure it is just as bad (and expensive to keep using) as Lightroom Classic.
In this post, whenever I mention Lightroom the Classic version is intended.
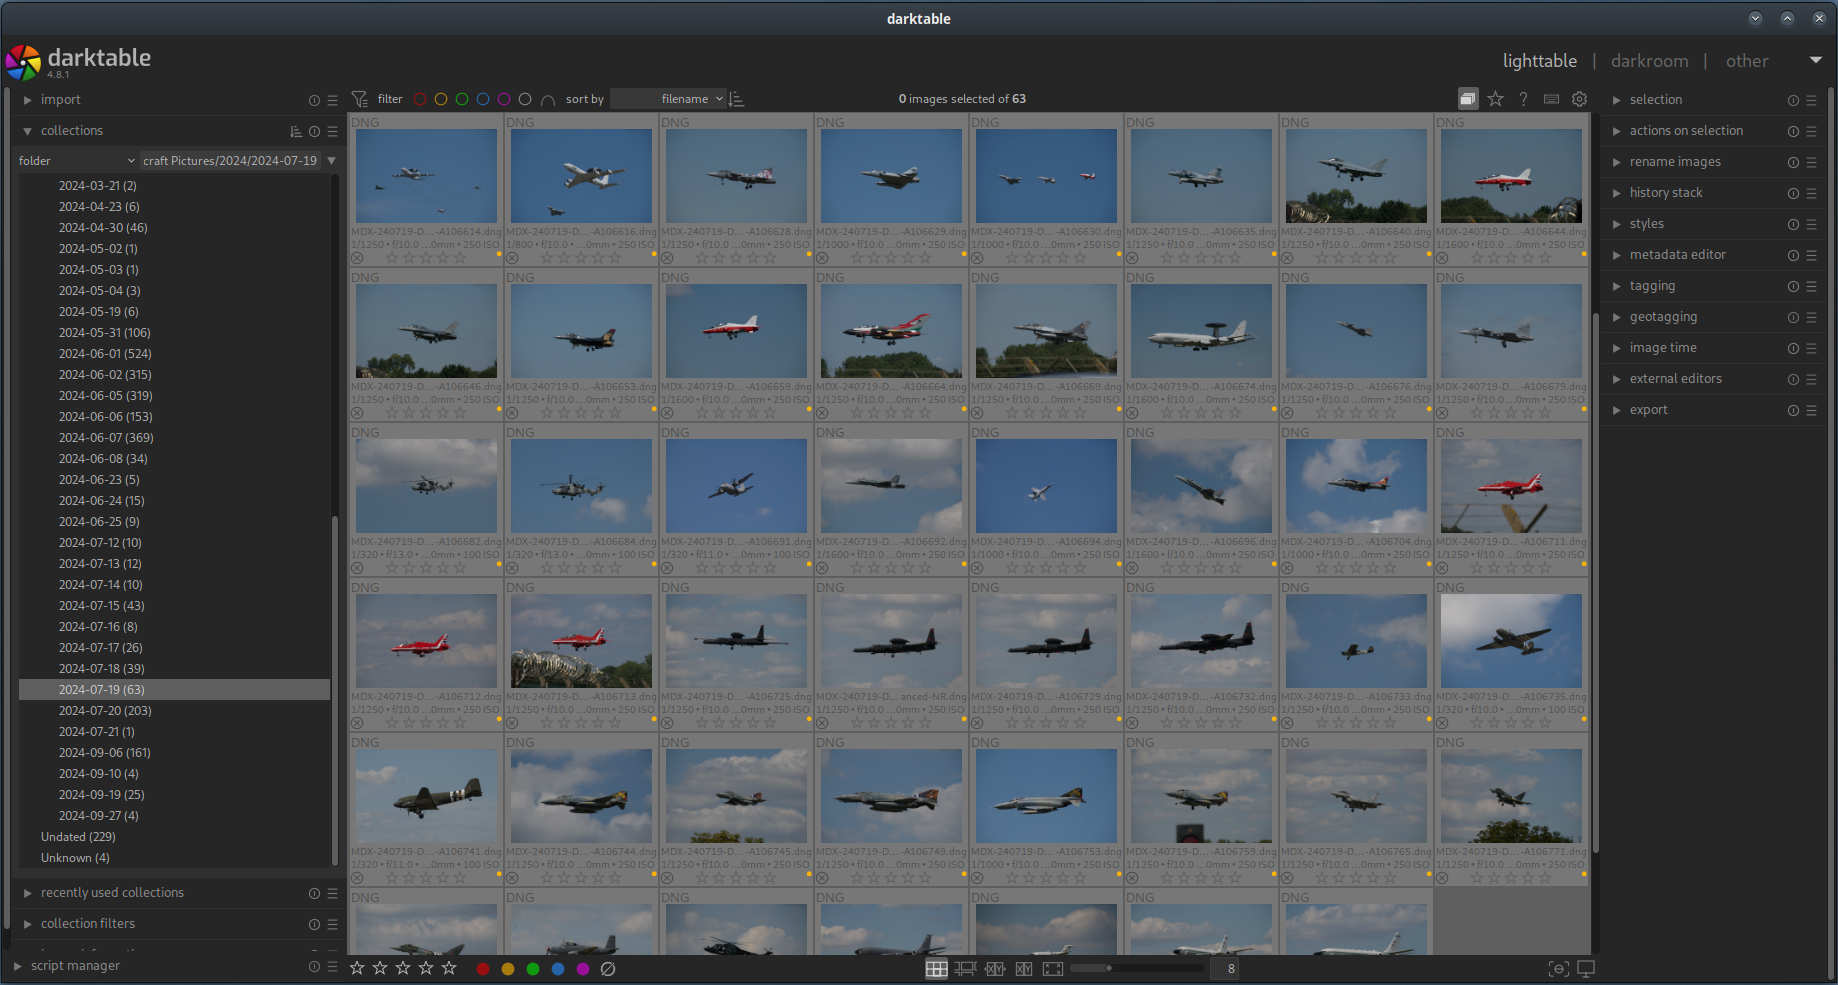
Introducing darktable
For many years there was no real alternative to Lightroom. There was this thing called darktable (a twist of words with Lightroom) which does work natively on Linux (Windows and MacOS too), and I actually installed it twice over the years, just to have a look at it. And then quickly uninstalled it again because it looked and felt just too clumsy and complex to even consider moving over. It too is an organiser and RAW processor, but with important differences.
Two weeks ago, I gave it another try, just out of curiosity. I was pleasantly surprised noticing the improved interface, and also there is now plenty of help available, on YouTube for instance. It looks like darktable has come of age and has become mainstream for the serious photographer who is willing to invest. In time and effort this time, not in money.
So…how does darktable compare to Lightroom? Is it a one-to-one replacement, a free Lightroom on Windows, MacOS and Linux? Yes…and no, in no particular order.
- darktable is freeware. The term “freeware” is often confused with “it costs nothing” but it actually means “free” as in “freedom”: it is open source and developed by a community instead of a money guzzling company. Having said that, darktable is indeed free to download and use without any money changing hands (so yes, in that sense it is free too).
- Although at first glance it looks very similar to Lightroom, darktable is NOT an one-on-one replacement. The philosophies behind darktable are quite different. The end result may be the same (or better even) but how you get there is not as you would go about in Lightroom.
- Being open source software, and the project publicly hosted on GitHub, you have access to not only the source code but also the repository with open and resolved issues, making troubleshooting, reporting an issue and getting help much easier. You can also add a feature request which will be looked into (assuming it is viewed as a serious request).
- It seems that darktable has grown from the niche software used by nerds, to the software of choice for many (semi) professional and serious amateur photographers alike.
- If you think the learning curve of Lightroom is (was) steep then you haven’t seen darktable yet. Although this has improved somewhat now. Once you understand the philosophy behind darktable and “it clicks” then you will see the logic and power behind it. I have been exploring and using darktable for two weeks now and I can honestly say I (already) like it better than Lightroom! But the first couple of days were rough…
- Lightroom claims it gives you 100% control over the processing of RAW images, but in reality that isn’t completely true. In fact it does already apply a lot of settings for you on the fly, and the editing tools are tailored to give you control but not too much to make it complicated. And in fact that’s what the true understanding of light and darkness, colour, hue, saturation and chroma (to name but a few) is: complicated. darktable does it differently: it does much less for you but gives you full control. Or said differently, especially as a beginner, it throws you in at the deep end. But once again: once you have learned to swim, develop your own workflow and presets, the water starts feeling more and more comfortable.
- Compared to my previous Lightroom setup, darktable is very fast! Finally I have GPU support, and no more resource hogging. Gone is the endless waiting for Lightroom to finish importing a batch of new images and building 1:1 previews.
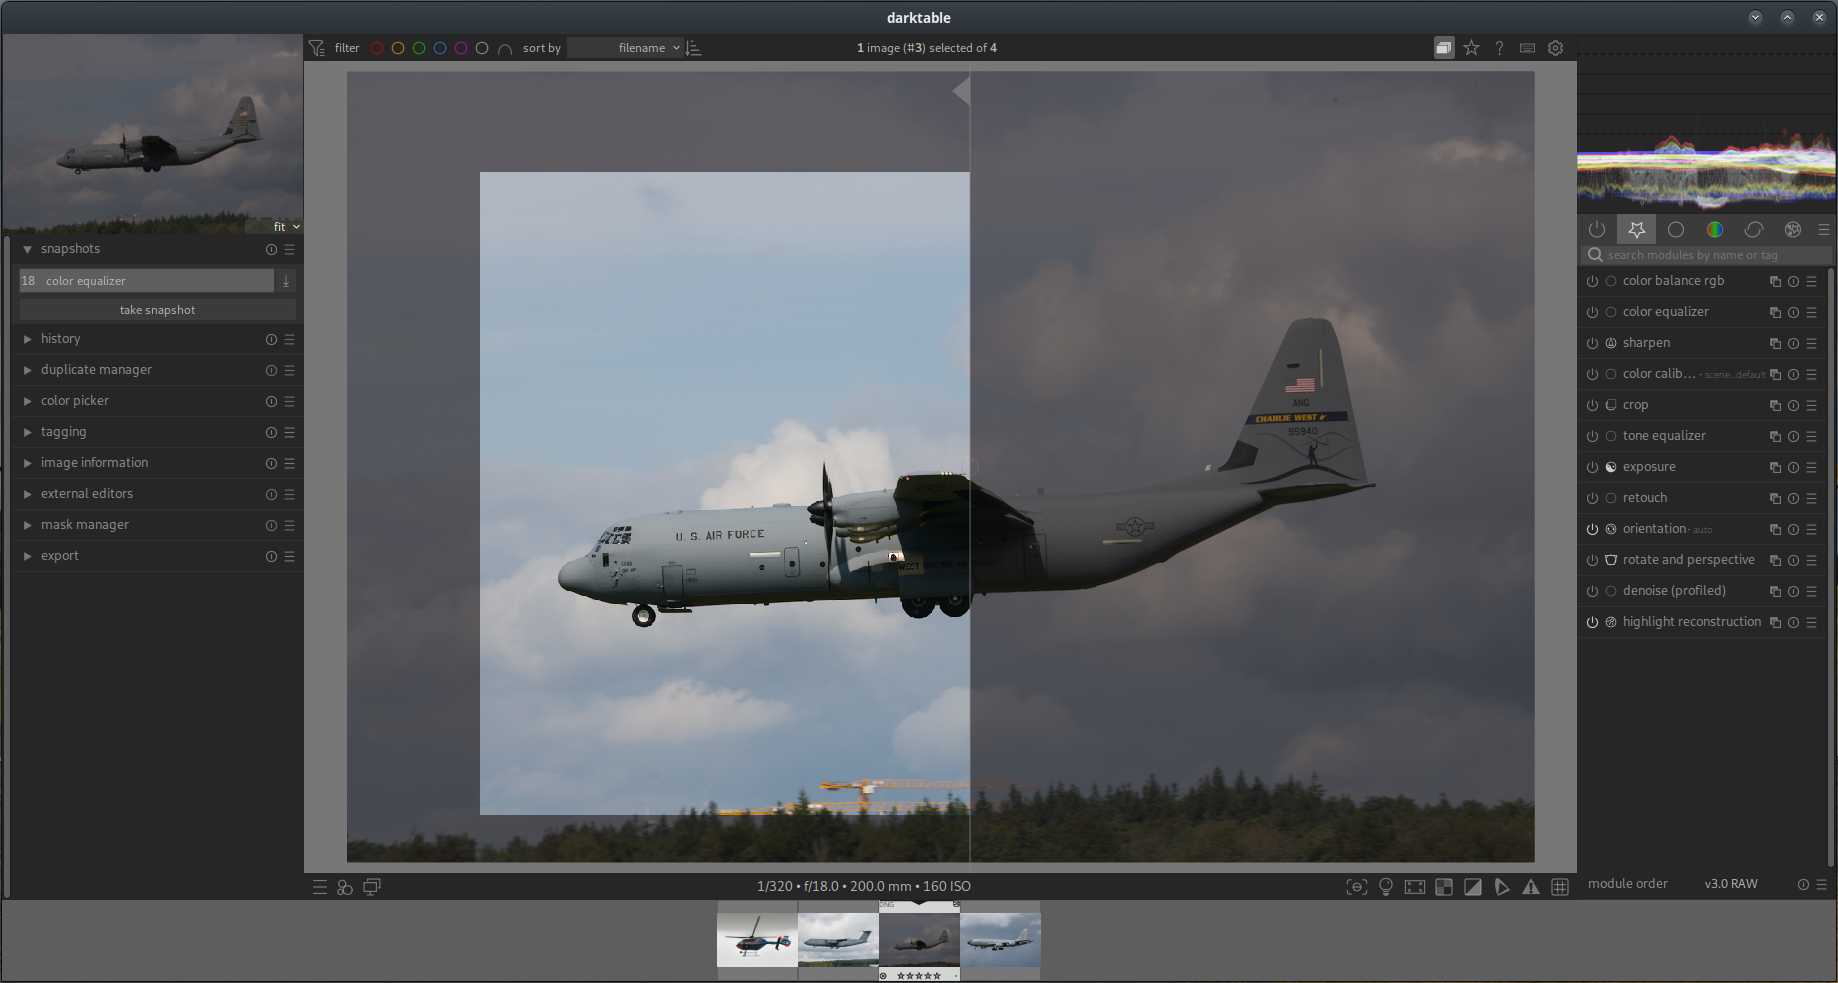
- Where Lightroom offers you a fixed workflow for RAW photo developing, darktable has a plethora of developing modules, some duplicating others, and it is up to you to learn and decide which ones to use and in which order. Fortunately there are now good tutorials online, some even targeted at those who are used to Lightroom and now want to start using darktable, and darktable is quite customisable with presets so that you can build your own personalised developing modules tab.
- You will be amazed by the power these modules give you. Every module has its own settings, and at first glance most will appear to be over complicated and impossible to learn, but just as it is with the number of modules itself, most of these settings you don’t need to touch 99% of the time. The trick is to learn which settings you do need to unlock the power of every darktable module. This post is not a tutorial, there are people online which do a much better job at that than me, but let me just say “simple” modules like “exposure”, “tone equalizer” and “denoise” were an eye-opener for me coming from Lightroom.
- I either shoot in RAW (Nikon, NEF files) or JPEG (phone), and from Lightroom day 1 I have converted all NEF files on import to the DNG format. The main reason for this is that DNG files did not need XMP sidecar files when developing in Lightroom. I want to keep importing as DNG in darktable, but the latter does not do that “on the fly”. Luckily Adobe has a (free!) DNG Converter tool which has now become part of my workflow, just a single easy step before actually importing into darktable. The DNG Converter is a Windows program but runs flawlessly on Linux with Wine. Other tools I sometimes use (ExifTool, NoiseNinja) have moved to Linux as well so that I no longer need a Windows computer or virtual machine for my photography workflow, from A to Z. Happy days!
Turning to the Dark Side
I only wanted to see for myself if darktable could work for me…maybe. And here we are, less than two weeks later, I have fully migrated to darktable and am no longer a Lightroom user.
First hurdle was to see whether I could import photos with a workflow not too different from what I was used to with Lightroom. Once that proved to be possible (and immediately learning to actually like the “lighttable” interface and its many options) I trusted that eventually developing RAW images in darktable could be mastered as well. I had already seen a couple of online tutorials and it looked daunting but not impossible.
Lightroom or darktable, are these the only options available? Certainly not. There is also Luminar, ON1 Photo Raw, Capture One, DxO PhotoLab and RawTherapee, to name “but a few”. I however have no experience at all with any of these.
For me there was only one option coming from Lightroom, and that’s darktable.
Unfortunately, migrating from Lightroom to darktable is not as simple as just importing Lightroom‘s catalog(s). You can’t. Development settings are not imported. You could use sidecar files to transfer these, but the results will not be the same. This is maybe the biggest (only?) down side of moving to darktable. The impossibility to transfer your developed images over to darktable actually illustrates how different the two are. What I ended up doing was to export all developed images in Lightroom as TIFF files, and add these to darktable besides the undeveloped original DNG’s. In future, I can gradually develop these images in Darktable if I feel the need to do so, and discard the corresponding TIFF.
My first attempts to actually develop a RAW image in darktable went better than expected. I had watched a few online tutorials aimed at the novice like me, and I quickly got the hang of it. Of course, for now I am only doing the “basic” things, I am sure there is still a lot of unexplored magic hiding in the large amount of available modules. The tutorials were very helpful in showing that you don’t need all modules, and of the ones you do need only a couple of settings or sliders actually matter. After I had gone over a couple of images I grouped these “basic” modules together in a custom tab to make life a bit easier. Once you get the hang of it you’ll love all the things you can customise!
Just like Lightroom, developing images in darktable is non-destructive, so you can try out what works for you and your image, and what not, and always go back a few steps or just start over again. I already like the history pane in darktable better because it behaves in a more logical way to me, grouping a specific module edits together instead of stacking each and every edit on top of each other.
What will I miss ?
I’m not sure yet. Change takes time to get used to, and some things you felt you couldn’t do without are easily forgotten over time. None of the things listed here are a big deal and never created any doubt whether I should migrate.
- In the last couple of Lightroom releases “smart” or “intelligent” auto settings and masks were introduced, which work pretty well most of the times. The “auto” develop button can be a hit or miss (but always overdoing saturation and vibrance, which was a bit of an annoyance especially because Adobe refuses to listen to its customers and adapt) but can be a good starting point. Having an automatic mode is perpendicular to the darktable philosophy so I don’t think it is in there, or ever will be. As for the intelligent masks, I haven’t worked all that much with masks in darktable yet so I can’t tell if I will miss them.
- The Lightroom catalog assigns an unique number to each imported image, which I had as part of an image file name. darktable doesn’t, it does have unique numbers but these are per “film roll”. So I had to revise my file naming convention for newly imported images, the existing images keep their “Lightroom name”.
- In Lightroom only one colour label could be assigned to an image. darktable has similar colour labels but these can all be assigned individually. Setting colour labels is part of my workflow to differentiate between images which have been developed and which not, and whether it is my database. In Lightroom I could assign a colour on import, darktable can’t (I’m sure it could be possible by adding a script, but that’s not worth the effort). I have redefined my workflow colours and it now feels like an improvement. The only thing I am really missing is in Lightroom you can also assign a colour label to a folder, which was handy for a quick overview of which folders still needed my attention for developing and adding to the database. darktable can’t do this. Maybe I will file a new feature request for this.
- I had one export preset in Lightroom where an image was exported to a folder and then automatically opened in GIMP (or Photoshop). I haven’t found a similar option on export in darktable. This probably needs to be scripted. With a plugin it is possible to export to an external program (like GIMP) but the destination folder can’t be set.
- I’m sure there is more. But already on several occasions I have found that things I thought were missing were just done in a different way in darktable, and done better.
Should you too ?
That’s not fo me to say. Having gotten this far down at least shows you have some interest. Without repeating myself too much , here are some points to consider, compared to Lightroom:
- There is no purchase, no subscription, it’s free to use.
- You’re no longer hostage to Adobe’s subscription scheme. You don’t need to keep paying money to keep access to your own photos. Or use illegally hacked downloads found online which could potentially mess up your computer in more ways than you can imagine…
- It does a better job than Lightroom, once you get to know the software (says the guy who himself is still discovering what darktable can do).
- It works equally well on Windows, MacOS and Linux. Oh, you’re on FreeBSD? No problem! All operating system flavours can install the latest and newest darktable release.
- Don’t give up on the first or second day of trying out darktable. It takes some time and a hefty learning curve to get comfortable with it. It will pay off in the end!
- darktable is NOT a one-on-one replacement for Lightroom. The ways darktable works are different. The end result may be the same (or better even) but don’t try to stick to doing things like you are used to in Lightroom. This may sound a little bit vague but once you get to know darktable you will see what I mean.
- Look on YouTube for a couple of tutorials, aimed at the newer darktable releases (4.x) and the novice user. Basic topics such as organising your photos, RAW developing in easy steps, moving from Lightroom to darktable, etc.
- Don’t try to do everything at once. I started with setting up importing and organising first, then did the actual importing of all my Lightroom material, before I even started looking at the “darkroom” development view.
- Be aware that you will loose all developed images from Lightroom, they will all either revert to the undeveloped RAW image or look funky if you import the XMP sidecar files too. I am not sure what will happen to tags and ratings as I never used these in Lightroom, but they will probably be lost as well.
- Ditch Lightroom once you have everything set up and imported in darktable. You can of course choose differently but I wouldn’t keep using both side by side, it will both be confusing and hindering you from really learning and appreciating darktable.
- Ask for help if you feel you need it.
That’s it !
Enough talking, time to head back to my darktable and explore it further!
If you got this far, let me know in the comments what your views are. Do you rather stick to Lightroom, some other software, are you already a darktable user, or have I triggered some interest in it? I’m curious to know!
And thank you for your attention.